


Because antenna manufacturers continually create new antennas, it is not possible to have all azimuth and elevation patterns predefined within AirMagnet Planner's Antenna Manager. Because of this, AirMagnet Planner allows users to create custom antenna patterns. This will enable AirMagnet Planner to accurately project the desired antenna pattern.
From time to time, we also release antenna patterns into your My AirMagnet account and bundled with new releases. You can click on PLANNER ANTENNA PATTERNS in your My AirMagnet account (in the left sidebar) for any new patterns we may have released.
Obtain the Antenna Pattern from the Manufacturer
The first step and probably the hardest, is to find the manufacturer’s antenna azimuth and elevation radiation pattern. Without this information, it will not be possible to accurately create the antenna pattern manually within Planner. Please contact your AP's manufacturer to obtain the access point or antenna pattern directly from them. They should send you something that looks like this (in this example, the Cisco 2800 series):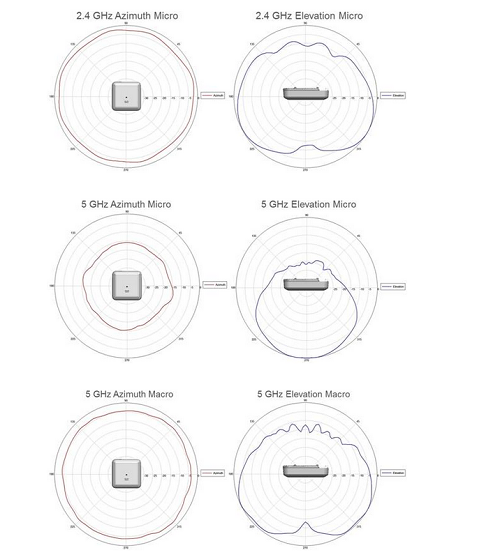
Create the Pattern within Planner
1. Now that you have the pattern, open AirMagnet Survey PRO or Planner, then open Multi Floor Planner. Antenna Manager can be found under the Tools menu.
2. In the Antenna Manager, click 'New':
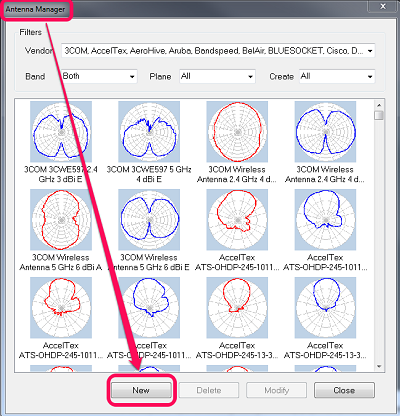
Note: When planning to create a new antenna pattern, it might be easier to start by using an existing pattern that is similar to the one you are creating. To do so, select a similar pattern shape from the list of antenna patterns in the Antenna Manager and click New. The new antenna pattern will be based on the pattern you selected.
3. Enter the following:
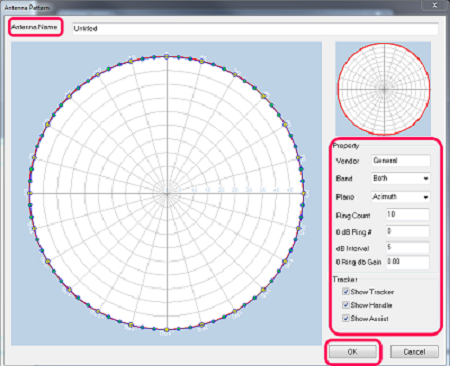
Adjust the antenna pattern drawing by dragging the Handle and Assist points as needed.
Ideally, this pattern should match the Azimuth and Elevation pattern from the manufacturer. This does mean some time will be spent on accuracy but once completed, it will be a part of the antenna list.
Note: this is a completely made up antenna pattern just for demonstration purposes: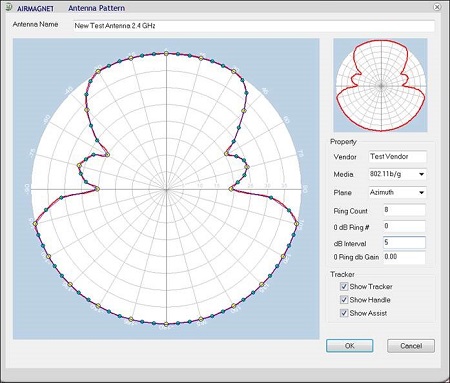
4. Click 'OK' to save.
5. Here is the new pattern showing up in the Antenna Manager; Click 'Close' when done.
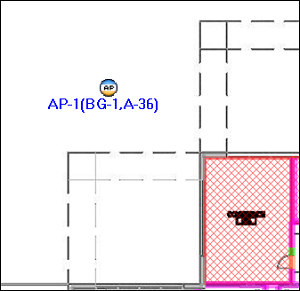
6. Open a project, open Planner, select a new AP and place it on the floor plan:
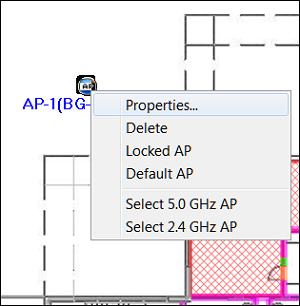
7. Right-click the placed AP and select 'Properties'.
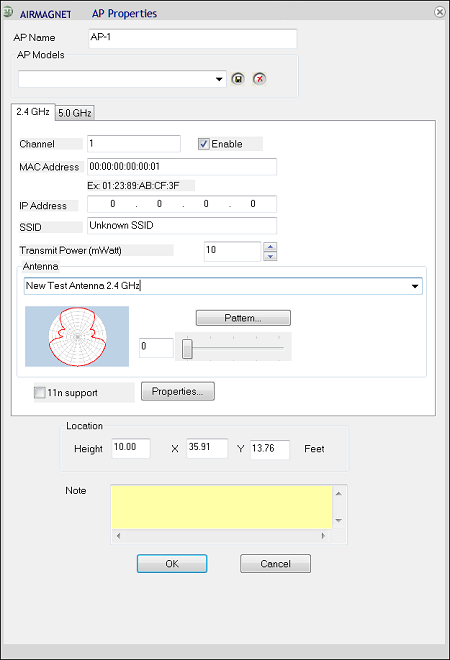
8. In the drop-down menu, select the new antenna (should be at the bottom).
9. With the antenna selected, configure any other AP properties desired and click 'OK'.
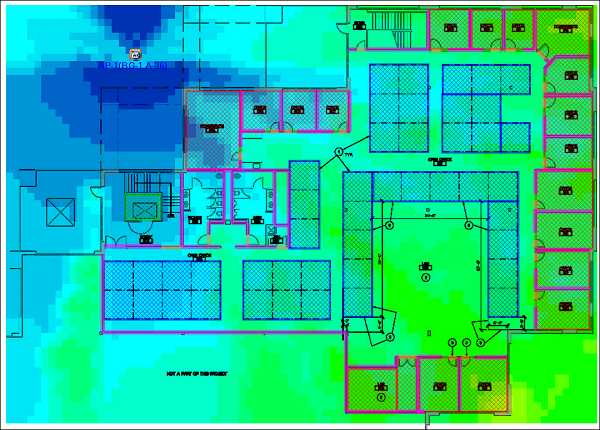
10. Refresh the project.

11. The signal level should reflect the antenna selected.
Note: once a custom antenna pattern is created, it is a good idea to save the newly created files to a network drive. This will allow others to access and import the pattern into their version of Survey Pro or Planner. This is also useful in the event of a computer crash as the antenna pattern will not have to be created again. It will just have to be imported.
C:\Program Files (x86)\AirMagnet Inc\AirMagnet Surveyor\Antenna
Let us know! To ask for a particular antenna pattern to be included in a future version of Survey Pro or Planner, please provide the manufacturer’s Azimuth and Radiation antenna patterns for a particular model number. With this information, a “user story” will be submitted to the AirMagnet development team and they will make a determination as to which future version of Survey Pro or Planner the antenna pattern could be entered.