How to configure multiple unit settings from Link-Live
You can make setting changes quickly and efficiently to multiple units from within Link-Live. Configuration settings can be adjusted and pushed to other units that are of the same type within your organization. For example, LinkSprinter settings can be pushed to other LinkSprinters, not any other unit.
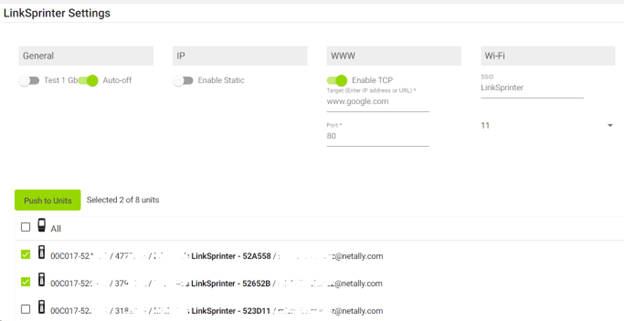
LINKSPRINTER, LINKRUNNER AT, OR LINKRUNNER G2 Settings cannot be uploaded to Link-Live from these units directly. However, you can make configuration changes from within Link-Live and push those settings to the unit(s). In the example below, you can see the LinkSprinter Settings configuration screen. Below the configuration you will see the claimed LinkSprinters in your organization. Select All or the specific unit(s) to which you would like to make changes.
Press “Push to Units” and you will see a brief dialog before being taken back to Results. Don’t forget to run a test from each unit so that it can connect to Link-Live and download the new settings.
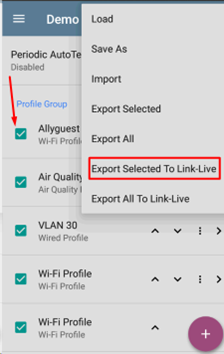
LINKRUNNER 10G, ETHERSCOPE NXG, CYBERSCOPE, AIRCHECK G3 Setting must be defined on the changes on the tester first. You cannot define or change the settings within Link-Live. In the example below we are using the EtherScope nXG but the process applies to LinkRunner 10G, CYBERSCOPE, and AirCheck G3 as well. Save Settings to Link-Live: 1. Open the AutoTest app and tap the 3-bar menu on the upper left. 2. Go to AutoTest Settings and tap the disk icon on the upper right. 3. Check or uncheck the Profile settings you want to export and then tap Export Selected to Link-Live.
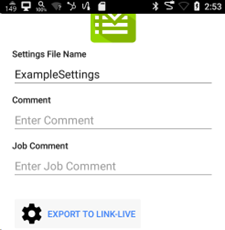
4. Enter the information to identify these settings and then tap EXPORT TO LINK-LIVE.
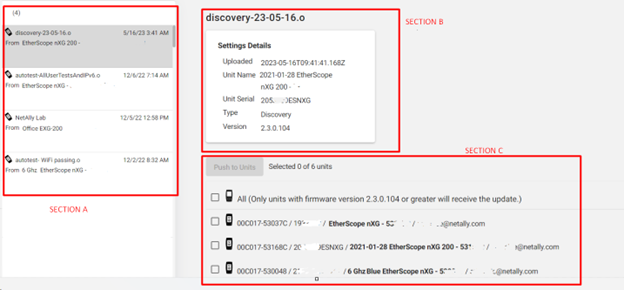
5. Once complete it will take you back to the settings page. You can now go to Link-Live to push those settings to another unit(s). Push to Unit(s) from Link-Live: Once you have successfully uploaded the settings, you will see them in the left pane (SECTION A) of the settings menu. When you click on a specific item you will see details about that item in SECTION B.
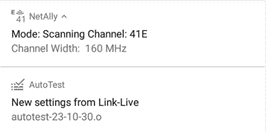
Below the Settings Details (SECTION B) you will see the claimed EtherScope units in your organization (SECTION C). Select All or the specific unit(s) that you want to make the changes to. When you are ready to push these settings, select the applicable unit(s) and click “Push to Units”. You will see a brief dialog before being taken back to Results. The next time the unit connects to Link-Live the settings will be downloaded automatically and a notification will appear on the unit and the settings are ready to be used.